
Piano Roll in FL Studio: A Guide to Melodies and Chords
FL Studio’s Piano Roll is a powerhouse for music production, offering unparalleled control over melody, harmony, and rhythm. Whether you’re crafting catchy hooks, lush chords, or intricate arpeggios, the Piano Roll is where your musical ideas come to life. This guide dives into advanced techniques for using Piano Roll in FL Studiol, covering everything from quantization to ghost notes and velocity adjustments. Perfect for beginners looking to level up or intermediate producers refining their skills, let’s unlock the full potential of the Piano Roll!
What is the Piano Roll in FL Studio?
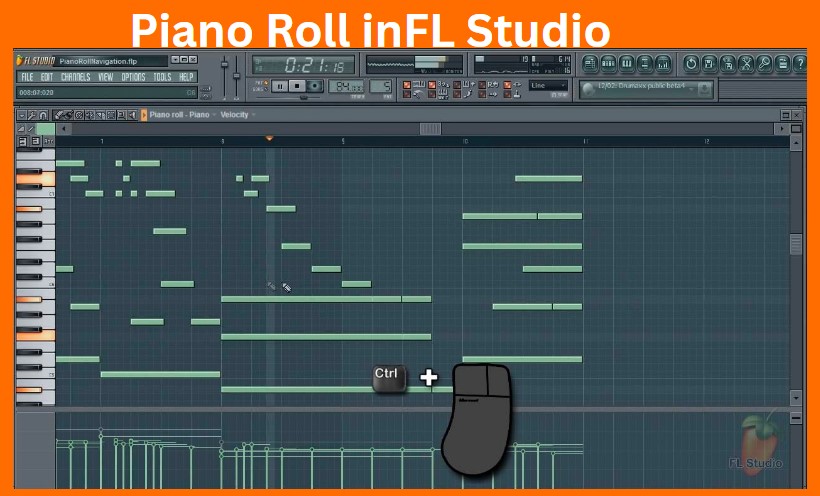
The Piano Roll is FL Studio’s primary tool for composing and editing MIDI data. It’s a grid-based interface where the vertical axis represents pitch (notes on a piano) and the horizontal axis represents time (beats or bars). Each note you place on the grid triggers a sound from a virtual instrument, such as a synth or piano plugin. The Piano Roll’s flexibility makes it ideal for creating melodies, chords, basslines, and even drum patterns.
Why Master the Piano Roll?
- Precision: Fine-tune every note’s pitch, timing, and dynamics.
- Creativity: Experiment with scales, chords, and arpeggios effortlessly.
- Efficiency: Tools like quantization and chord stamps speed up your workflow.
- Versatility: Works with any MIDI-compatible instrument or plugin.
Getting Started with the Piano Roll
To access the Piano Roll:
- Open the Channel Rack (F6) and add a virtual instrument (e.g., FL Keys, Sytrus, or a third-party plugin like Serum).
- Right-click the instrument’s name in the Channel Rack and select “Piano Roll” (or press F7).
- The Piano Roll window will appear, ready for you to start composing.
Core Piano Roll Techniques
Let’s explore the foundational skills you need to create compelling melodies and chords.
1. Drawing and Editing Notes
- Placing Notes: Click on the grid to add a note. The note’s position determines its pitch, and its length sets its duration.
- Moving Notes: Click and drag a note to change its pitch or timing.
- Resizing Notes: Drag the right edge of a note to adjust its length.
- Deleting Notes: Right-click a note or select it and press Delete.
Pro Tip: Hold Ctrl while clicking to draw multiple notes in a row, perfect for creating quick scales or arpeggios.
2. Using the Brush Tool
The Brush tool (paintbrush icon) lets you “paint” notes across the grid, ideal for rapid sketching of melodies or chords.
- Click the Brush icon in the Piano Roll toolbar.
- Drag across the grid to draw a continuous stream of notes.
- Adjust the brush size (via the toolbar) for shorter or longer notes.
3. Working with Scales
To ensure your melody stays in key:
- Click the stamp icon (triangle) in the Piano Roll toolbar.
- Select “Scale Highlighting” and choose a scale (e.g., C Minor or G Major).
- The grid will highlight notes in the selected scale, making it easier to compose harmonically.
Advanced Piano Roll Techniques
Once you’re comfortable with the basics, these advanced techniques will elevate your compositions.
1. Quantization
Quantization aligns notes to the grid for precise timing, essential for tight, professional-sounding tracks.
- Manual Quantization:
- Select notes (Ctrl+A for all notes or drag to select specific ones).
- Press Alt+Q or click the magnet icon and choose “Quantize.”
- Adjust the quantization grid (e.g., 1/4 note, 1/16 note) in the Snap panel.
- Quick Quantize Start Times: Use Shift+Q to align only the start of notes, preserving their lengths.
- Humanizing: After quantizing, use the “Randomize” tool (Alt+R) to add slight timing variations for a natural feel.
Pro Tip: Quantize sparingly for genres like jazz or lo-fi, where slight timing imperfections add character.
2. Chord Creation
FL Studio’s Piano Roll simplifies chord composition:
- Chord Stamps:
- Click the stamp icon and select a chord type (e.g., Major, Minor, Sus4).
- Click on the grid to place the chord at your desired root note.
- Chord Progression Tool:
- Go to Tools > Chord Progression Generator.
- Choose a key and progression (e.g., I-IV-V-I).
- The Piano Roll will populate with a series of chords.
- Manual Chords: Stack notes vertically to create custom chords. Use the scale highlighter to stay in key.
3. Arpeggios
Arpeggios are broken chords played in sequence, adding movement to your tracks.
- Manual Arpeggios:
- Place a chord in the Piano Roll.
- Use the “Chop” tool (Alt+U) to split the chord into individual notes.
- Rearrange the notes in a rising or falling pattern.
- Arpeggiator Plugin:
- Add an arpeggiator effect to your instrument (e.g., via the Mixer or plugin settings).
- Adjust the pattern, speed, and range for automated arpeggios.
4. Ghost Notes
Ghost notes show notes from another pattern or instrument in the same Piano Roll, helping you compose complementary parts.
- Enable ghost notes: Go to View > Ghost Notes (Alt+V) or click the ghost icon in the toolbar.
- Use cases:
- Align a bassline with a melody by referencing the melody’s ghost notes.
- Create counter-melodies that harmonize with your main theme.
- Pro Tip: Double-click the Piano Roll background to switch between patterns without leaving the Piano Roll.
5. Velocity Adjustments
Velocity controls the loudness and intensity of each note, adding expressiveness.
- Manual Adjustment:
- Click the velocity tab at the bottom of the Piano Roll (or press Alt+B).
- Drag the velocity bars up or down for each note.
- Randomize Velocity:
- Select notes and press Alt+R.
- Adjust the velocity randomization slider for subtle variations.
- Pro Tip: For realistic piano or string parts, vary velocity to mimic human playing.
6. Slide and Portamento
- Slide Notes: Use slide notes (triangle icon) to create smooth pitch transitions, great for basslines or synth leads.
- Click the slide icon in the toolbar.
- Place a slide note to glide from one pitch to another.
- Portamento: Enable portamento in your instrument’s settings (e.g., in Sytrus or Harmor) for smoother note transitions.
Creative Tips for Piano Roll Mastery
- Layer Melodies: Duplicate a melody, transpose it up or down an octave, and adjust velocities for a fuller sound.
- Use Markers: Add time markers (Ctrl+Alt+T) to label sections like “Verse” or “Chorus” for better organization.
- Experiment with Scales: Try exotic scales like Phrygian or Lydian for unique vibes.
- Automate Parameters: Right-click parameters (e.g., filter cutoff) in your plugin and link them to the Piano Roll for dynamic effects.
- Split Patterns: Use the “Split by Channel” tool (Alt+P) to separate complex patterns into individual instruments.
Common Piano Roll Mistakes to Avoid
- Over-Quantizing: Perfect timing can sound robotic. Use partial quantization or humanize notes.
- Cluttered Patterns: Too many notes can overwhelm listeners. Leave space for your mix to breathe.
- Ignoring Velocity: Flat velocities make melodies sound lifeless. Always tweak dynamics.
- Not Using Snap: Disable snapping for freeform composition, but enable it for precise edits to avoid off-grid notes.
Integrating the Piano Roll with Your Workflow
The Piano Roll doesn’t exist in isolation—it’s part of FL Studio’s ecosystem. Here’s how to connect it to other tools:
- Channel Rack: Use the Piano Roll to sequence instruments, then arrange patterns in the Channel Rack.
- Playlist: Drag Piano Roll patterns to the Playlist to build your song structure.
- Mixer: Route your instrument to a Mixer track and add effects like reverb or delay to enhance your melody.
- Automation: Automate Piano Roll parameters (e.g., panning or volume) for evolving sounds.
Practice Exercises to Hone Your Skills
- Melody Challenge: Create a 4-bar melody in C Minor using only 5–7 notes. Focus on varying note lengths and velocities.
- Chord Progression: Build a I-IV-V-I progression in G Major using chord stamps, then add a simple arpeggio.
- Layering: Compose a lead melody, duplicate it, and transpose the duplicate down an octave to create a bassline using ghost notes.
- Quantization Practice: Record a melody by playing on a MIDI keyboard, then quantize it to 1/16 notes and adjust velocities.
Conclusion
FL Studio’s Piano Roll is a versatile and intuitive tool that transforms your musical ideas into reality. By mastering techniques like quantization, ghost notes, velocity adjustments, and chord creation, you can craft professional-grade melodies and harmonies. Experiment with the tools, practice regularly, and integrate the Piano Roll into your broader production workflow. Whether you’re producing EDM, hip-hop, or cinematic scores, the Piano Roll is your canvas for creativity. Open FL Studio, dive into the Piano Roll, and start composing your next masterpiece today!