
How to Add and Manage VST Plugins in FL Studio
One of the biggest advantages of FL Studio is its flexibility with VST plugins. Whether you’re using virtual instruments, effects, or synthesizers, adding and managing plugins properly ensures smooth performance and creativity.
In this complete guide, you’ll learn how to add, organize, and manage VST plugins in FL Studio — from installation to troubleshooting. Perfect for beginners and intermediate producers looking to build the perfect plugin setup.
What Are VST Plugins in FL Studio?
Before jumping into the steps, let’s understand what VST plugins actually are.
VST (Virtual Studio Technology) plugins are software components that expand your DAW’s capabilities. In FL Studio, they appear as instruments or effects you can load onto your tracks.
Types of Plugins:
- VST Instruments (VSTi):
These generate sound — like synths, pianos, basses, and drum machines.
Examples: Vital, Serum, Spitfire LABS. - VST Effects (VSTfx):
These modify sound — such as EQs, compressors, delays, and reverbs.
Examples: OTT, Valhalla Supermassive, TDR Nova.
Adding VSTs to FL Studio allows you to shape your sound exactly how you want, giving you endless creative possibilities.
Step 1: Download and Install the Plugin
To use a VST plugin, you must first download and install it on your computer.
Where to Find Free & Paid Plugins
- Free plugins: Many developers offer professional-quality VSTs for free (e.g., Vital, Spitfire LABS, Dexed).
- Paid plugins: Premium options like Serum, Omnisphere, and Nexus provide advanced sound design capabilities.
Installation Steps
- Download the plugin installer from the developer’s official website.
- Extract the ZIP or run the
.exe/.pkgfile. - During installation, note the VST Plugin Folder path — usually:
C:\Program Files\VSTPlugins(Windows)/Library/Audio/Plug-Ins/VST(macOS)
- Select the VST2 or VST3 version (VST3 is newer and recommended).
- Complete installation and close the installer.
Pro Tip: Always install 64-bit versions of plugins for compatibility with FL Studio 64-bit.
Step 2: Add the Plugin Folder to FL Studio
Once installed, you need to tell FL Studio where the plugin files are located.
Path Setup:
- Open FL Studio.
- Click on the “Options” menu in the top toolbar.
- Select “Manage Plugins.”
This opens the Plugin Manager window. - In the Plugin search paths section, click the folder (+) icon.
- Navigate to the folder where your plugin was installed (for example:
C:\Program Files\VSTPlugins) and click OK.
Now FL Studio knows where to look for your plugin files during the scan.
LSI keywords: add new VST folder in FL Studio, FL Studio plugin manager setup, scan VST directory.
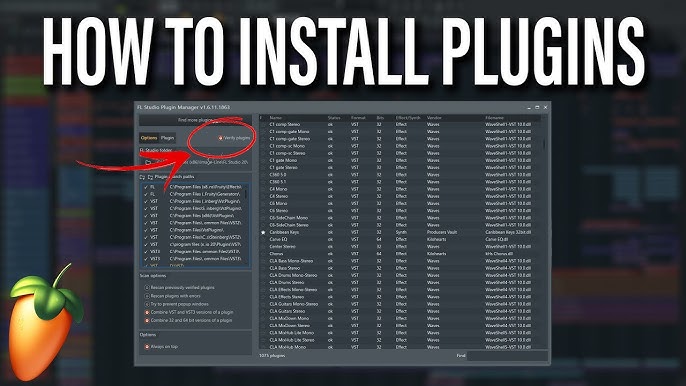
Step 3: Scan for New Plugins
After adding the folder, FL Studio must scan it to detect and register your new VST plugins.
How to Scan:
- In the Plugin Manager, click “Find Plugins.”
- FL Studio will scan all directories listed under Plugin search paths.
- Wait for the scan to finish. You’ll see your new plugin listed (it will appear in yellow the first time).
If the scan finishes successfully, your plugin is now ready to use.
Tip: Some plugins appear as both VST2 and VST3 versions — use VST3 if available, as it’s more stable and efficient.
Step 4: Load a Plugin in FL Studio
Now that your plugin is installed and scanned, it’s time to load it into a project.
For VST Instruments (VSTi):
- Go to the Channel Rack.
- Click the “+” button at the bottom.
- Choose “More plugins…”
- In the list, find your new plugin and click the star icon next to it (this marks it as a favorite).
- Next time, it will appear directly in the “+” menu for quick access.
Your new virtual instrument is now added to the channel rack — ready for melodies, chords, and basslines!
For VST Effects (VSTfx):
- Open the Mixer (F9).
- Select a mixer track.
- Click one of the Effect Slots (right side).
- From the list, choose your plugin (e.g., OTT, Valhalla Supermassive).
You’ll instantly see the plugin interface open — tweak your parameters and enjoy new sounds!
Step 5: Organize and Manage Plugins in FL Studio
As your plugin collection grows, organization becomes essential. FL Studio’s Plugin Manager helps you categorize, rename, and favorite your tools for faster access.
Managing Your Plugin List
- Open Plugin Manager (
Options → Manage Plugins). - Use the Filter panel to view only instruments, effects, or recently added plugins.
- Click the star icon next to plugins you use frequently — they’ll appear in your quick-access lists.
- Right-click a plugin name → choose Rename / Colorize for easier identification.
- You can also create custom plugin categories (like “Synths,” “Reverbs,” “EQs,” etc.) for better workflow.
LSI Keywords: organize plugins in FL Studio, favorite VST plugins, rename plugin, plugin manager tips, sort by category.
Step 6: Updating and Removing Plugins
Keeping your plugins updated ensures better stability and performance in FL Studio.
Updating Plugins
- Visit the plugin developer’s site and download the latest version.
- Reinstall using the same folder path.
- Re-scan in Plugin Manager (click “Find Plugins”) to update FL Studio’s list.
Removing Plugins
If you no longer use a plugin or it causes errors:
- Close FL Studio.
- Delete the plugin’s DLL or VST3 file from your plugin folder.
- Open FL Studio → Plugin Manager → Rescan to remove it from the list.
Tip: Regularly clean up unused plugins to keep FL Studio running smoothly.
Step 7: Fixing Plugin Not Showing in FL Studio
Sometimes, new plugins don’t appear after installation — don’t worry, it’s easy to fix.
Common Causes & Fixes:
- Wrong installation path:
Ensure the plugin was installed to your selected VST folder.
→ Solution: Add the correct folder in Plugin Manager. - Plugin format not supported:
FL Studio supports VST2, VST3, and AU (Mac) only.
→ Solution: Reinstall in supported format. - 32-bit vs 64-bit mismatch:
FL Studio 64-bit cannot load 32-bit plugins without bridging.
→ Solution: Always install 64-bit plugins. - Not scanned yet:
→ Solution: Click “Find Plugins” again.
LSI Keywords: plugin not showing in FL Studio, VST error fix, FL Studio troubleshooting, rescan VST plugins.
Step 8: Managing Plugin Databases for Faster Workflow
FL Studio uses a plugin database system to store your favorites and custom categories. You can access this via the Browser Panel on the left.
Create Custom Plugin Folders:
- Go to the Browser → Plugin Database → Installed.
- Right-click → Create new category (e.g., “Mixing,” “Synths,” “Vocals”).
- Drag and drop your favorite plugins into that category.
Now your frequently used VSTs are just one click away!
Step 9: Using Third-Party Plugin Managers (Optional)
If you use dozens of plugins from different developers, you can also use third-party plugin management tools like:
- Plugin Boutique’s Scaler Manager
- PluginDoctor (for testing plugins)
- Presonus Hub or Waves Central (for managing specific plugin families)
These tools help keep your installations clean and organized.
Step 10: Backing Up and Transferring Plugins
When switching computers or upgrading your system, backup your plugin files and FL Studio settings.
Backup Steps:
- Copy your VST folder to an external drive.
- Export your Plugin Manager settings:
- Go to
Options → Manage Plugins → Plugin search paths. - Note your folder locations for re-import later.
- Go to
- On your new system, install FL Studio and paste your plugins back into the same paths.
- Re-scan the plugin folders — your setup will be restored.
LSI Keywords: transfer FL Studio plugins, backup VST library, migrate plugins safely.
Pro Tips for Plugin Management in FL Studio
- Use consistent paths: Always install plugins in the same folder.
- Keep plugins updated: Reduces bugs and improves performance.
- Tag and color plugins: Makes navigation much faster.
- Limit duplicates: Avoid installing both VST2 and VST3 versions unless necessary.
- Backup regularly: Protects your sound library from data loss.
- Group effects by function: For example, group “EQ,” “Reverb,” “Delay” separately.
- Test CPU usage: Use FL Studio’s “Plugin Performance Monitor” to check resource load.
Benefits of Proper Plugin Management
Managing your VST plugins efficiently helps you:
- Speed up workflow: Quickly find and load instruments or effects.
- Improve stability: Prevent crashes and missing plugin errors.
- Enhance creativity: Stay focused on producing instead of searching.
- Optimize performance: Avoid loading outdated or conflicting versions.
When your plugin library is organized, FL Studio becomes faster, cleaner, and more enjoyable to use.
FAQs
Conclusion
Adding and managing VST plugins in FL Studio is simple once you know the steps. From downloading and installing to organizing and troubleshooting, proper management ensures a smooth music production workflow. By keeping your plugin folders clean, using the Plugin Manager efficiently, and favoriting essential tools, you’ll spend less time searching and more time producing.
Whether you’re using free synths like Vital and Dexed or pro tools like Omnisphere and FabFilter, managing your plugins the right way helps unleash the full power of FL Studio. So start today — scan, organize, and optimize your plugin setup. Your future tracks will thank you!